Bootstrap Checkbox Toggle
Overview
From time to time the easiest aspects may possibly become extremely essential-- specifically in case you get to need them. For example precisely how do your website visitors communicate with the web pages you make claiming a simple Boolean act-- simply yes or no relating to some of the issues you need to ask, precisely how they do confirm the conditions and terms or maybe line up a few of the achievable choices they might possess. We typically get past this with no paying enough of an attention to the element chargeable for such actions still, the Bootstrap Checkbox Button is really a quite critical element-- one our forms cannot in fact perform without.
In the latest fourth edition of the Bootstrap framework we are supplied with the
.form-check.form-check-label<div>.form-check.form-check-label<label><input>.form-check-inputThe way to make use of the Bootstrap checkbox:
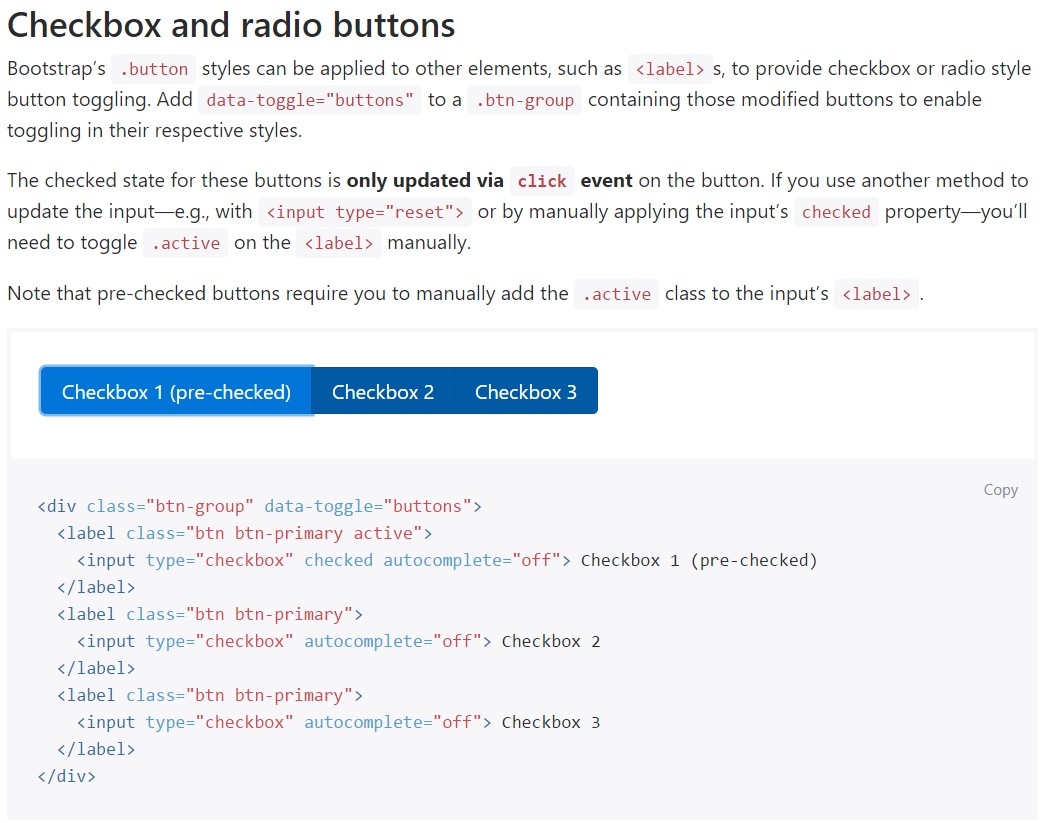
Bootstrap's
.button<label>data-toggle=" buttons".btn-group
<div class="btn-group" data-toggle="buttons">
  <label class="btn btn-primary active">
    <input type="checkbox" checked autocomplete="off"> Checkbox 1 (pre-checked)
  </label>
  <label class="btn btn-primary">
    <input type="checkbox" autocomplete="off"> Checkbox 2
  </label>
  <label class="btn btn-primary">
    <input type="checkbox" autocomplete="off"> Checkbox 3
  </label>
</div>
In certain cases we need the checkboxes to be inside our forms without the user actually having the capacity to take some action clicking on them-- that is simply where the disabled option shows up.
In order to disable efficiently a checkbox in Bootstrap 4 using the basic HTML attribute
disabledOn the occasion that you enjoy the tip and simply desire to do this you need to specify the
.disabled.form-checkSome other representation
When using checkboxes, wrap all of them in a
<label>.custom-control.custom-checkboxApply
.custom-control-input<input>Additionally employ two
<span>.custom-control-indicator.custom-control-description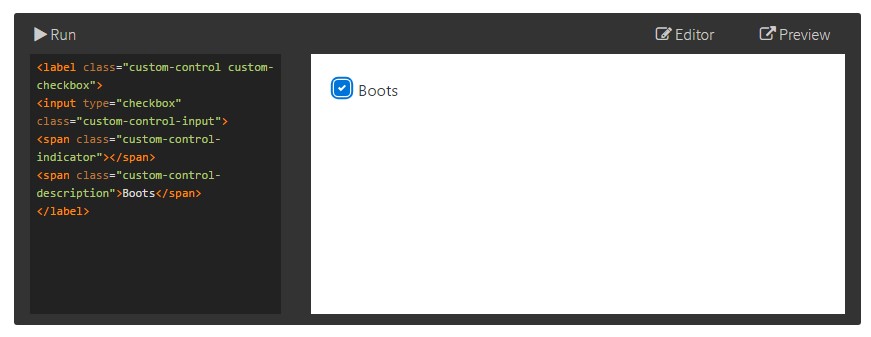
<label class="custom-control custom-checkbox">
<input type="checkbox" class="custom-control-input">
<span class="custom-control-indicator"></span>
<span class="custom-control-description">Boots</span>
</label>
Bootstrap Checkbox Form forms
Default checkboxes and radios are raised upon with the support of
.form-checkThe disabled class is going to in addition make lighter the text message color to help specify the input's state.
A new thing for the Bootstrap edition 4 system is the release of the so called custom-made form components. These are the very same features we are used to within usefulness but styled much more attractive and also in the Bootstrap way. With them you can surely bring in special excitement and individuality to your material via simply appointing a few supplemental classes to the controls you include in your forms.
In order to work with customized checkboxes wrap them in a
<label>.custom-control.custom-checkbox<input>.custom-control-input<span>.custom-control-indicator.custom-control-descriptionConclusions
That's pretty much all you should work on in order to include a checkbox component inside your Bootstrap 4 powered websites and put in certain custom flavor to it adding it a quality appearances. Now everything you need to do is repeat the drill before you've examined all of the checkboxes wanted are readily on the webpage.
Review a number of video training relating to Bootstrap checkbox
Linked topics:
Bootstrap checkbox formal documents
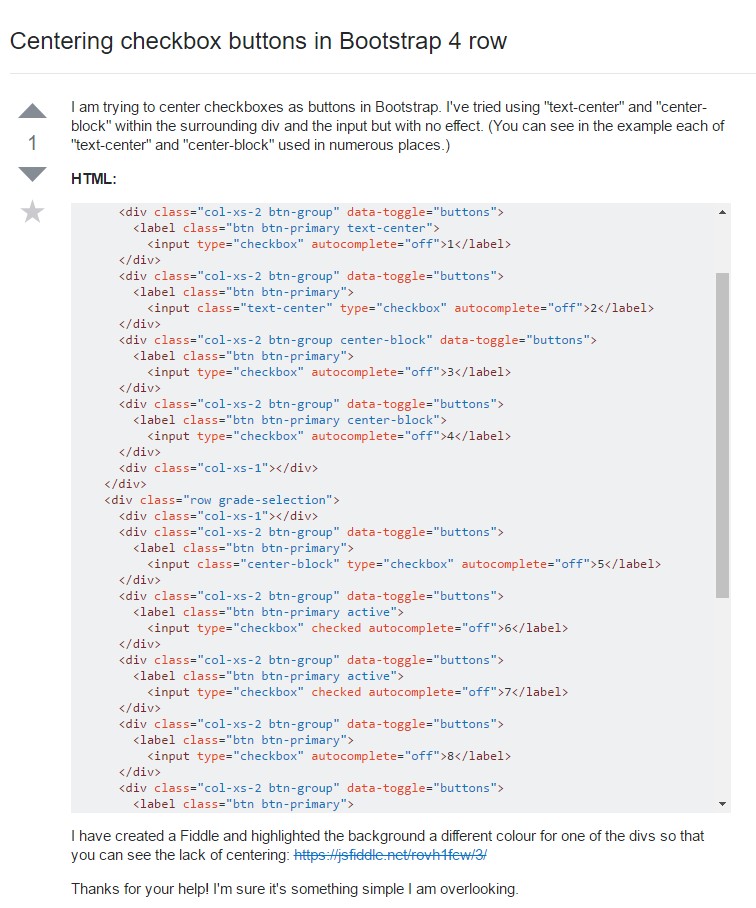
Centering checkbox buttons in Bootstrap 4 row
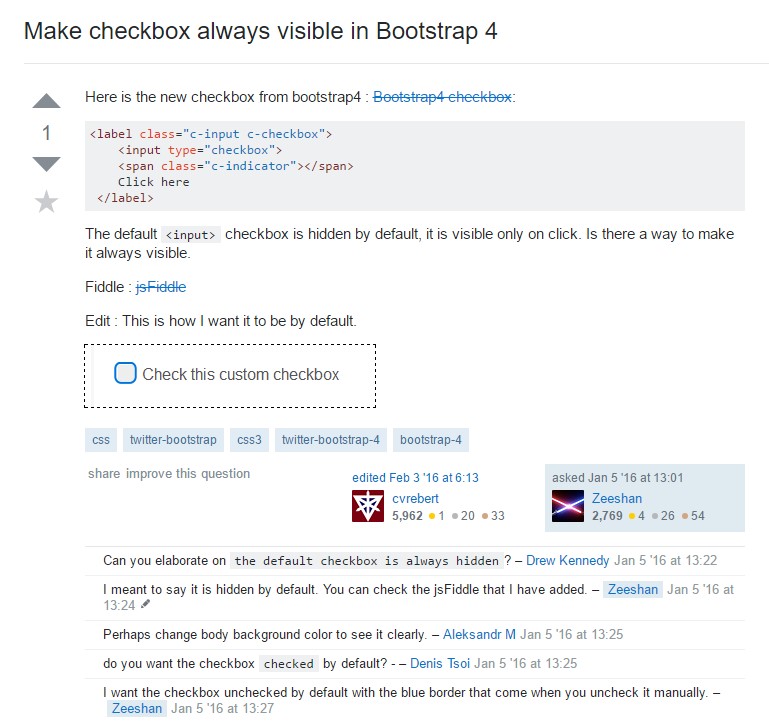
Make checkbox always visible in Bootstrap 4